

i bought my ribbon from hobby lobby, i'm not sure what it's made of, but it's amazing and not too pricey!I i don’t believe this method will work with grosgrain or silk ribbon, but it WILL work with acetate – for all you ribbon connoisseurs.
step 1: go ahead and wrap your present, and top it with a ribbon.
wait…i've lost you already? here’s another tutorial for those who are wrapping-impaired.
leave the ends of your ribbon loose – later referred to as “ribbon 1”.
[fyi: i CAN wrap a box…with paper…promise!]
step 2: dispense enough ribbon to make your bow - i unreeled about 5 feet. now cut it, and reel it back up, as if it’s on a spool again. the bigger your circle, the longer your bow “loops” will be. my circle is a tiny bit bigger than my hand.
step 3: press it together in the middle, like you’re forming a BOW [who woulda thought?!]
step 4: cut a tiny v-slit on one side of the bow – be sure to not cut all the way to the middle. i'm actually using my kitchen shears because, depending on the amount of ribbon you use, it can get pretty thick! [ps: i'm a really good photog, right?]
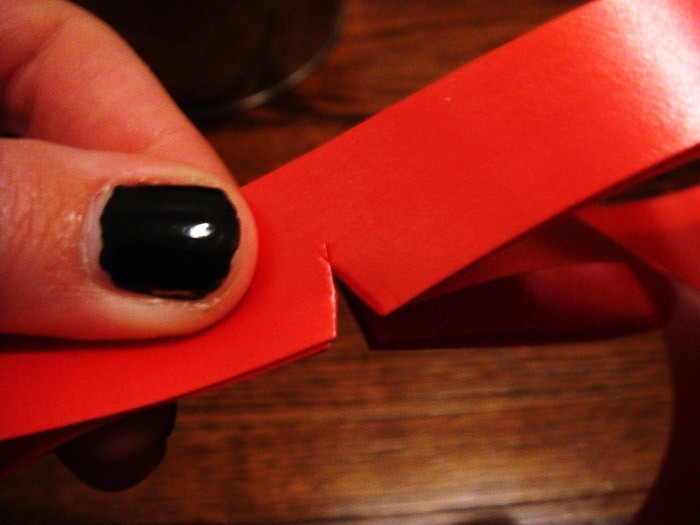
step 5: repeat on side 2. it’s VERY important that your “v's” don’t touch [even a little bit].
if they do, you’ve just destroyed your beautiful bow. sorry ‘bout it.
step 6: place the bow on your present, and tie the loose ends [from ribbon 1] to stabilize the bow. tight!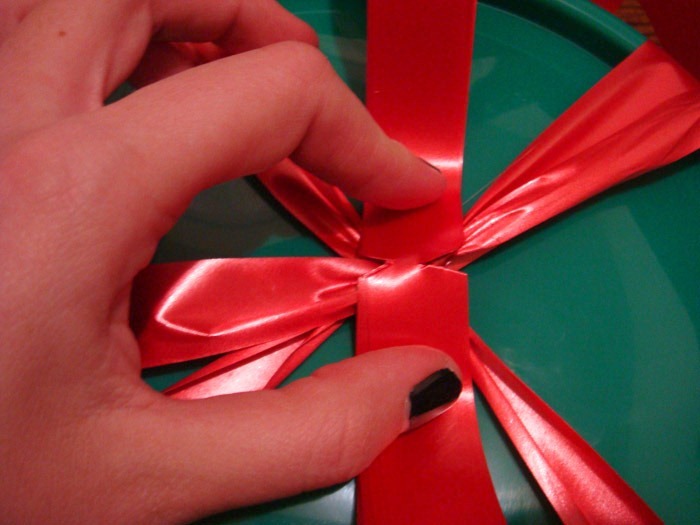

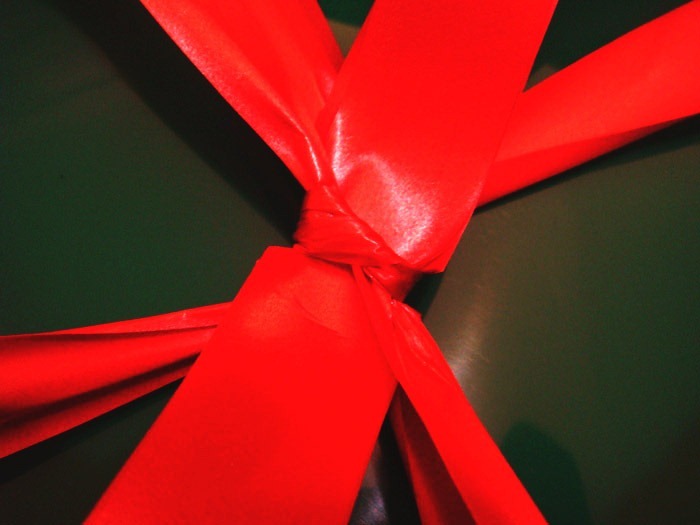 lastly, “fluff” your bow by pulling each loop, one at a time, towards the center knot with ribbon 1. i find that it works best if you start from the inside of each loop, separating each layer, and just working it until it looks the way you like!
step 1: go ahead and wrap your present, and top it with a ribbon.
wait…i've lost you already? here’s another tutorial for those who are wrapping-impaired.
leave the ends of your ribbon loose – later referred to as “ribbon 1”.
[fyi: i CAN wrap a box…with paper…promise!]
step 2: dispense enough ribbon to make your bow - i unreeled about 5 feet. now cut it, and reel it back up, as if it’s on a spool again. the bigger your circle, the longer your bow “loops” will be. my circle is a tiny bit bigger than my hand.
step 3: press it together in the middle, like you’re forming a BOW [who woulda thought?!]
step 4: cut a tiny v-slit on one side of the bow – be sure to not cut all the way to the middle. i'm actually using my kitchen shears because, depending on the amount of ribbon you use, it can get pretty thick! [ps: i'm a really good photog, right?]
step 5: repeat on side 2. it’s VERY important that your “v's” don’t touch [even a little bit].
if they do, you’ve just destroyed your beautiful bow. sorry ‘bout it.
step 6: place the bow on your present, and tie the loose ends [from ribbon 1] to stabilize the bow. tight!
lastly, “fluff” your bow by pulling each loop, one at a time, towards the center knot with ribbon 1. i find that it works best if you start from the inside of each loop, separating each layer, and just working it until it looks the way you like!
don’t forget to curl the loose ends!
now, stand back and admire the beauty of the easiest bow EVER!
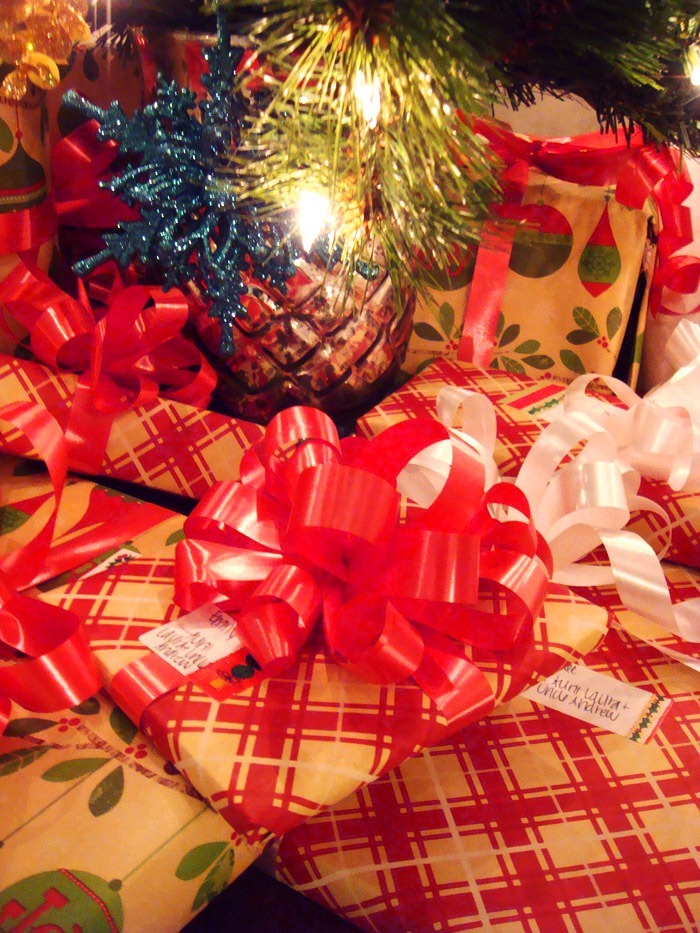
see? hand-wrapped box prezzies.
now, stand back and admire the beauty of the easiest bow EVER!
see? hand-wrapped box prezzies.


4 comments:
Are you serious?! It's THAT easy?! Even I may be able to do that!
This makes SO much more sense now. Amazing tutorial. I wish I had more presents to wrap! Maybe I'll change all my bows out! :)
Those are adorable! I always wondered how they did those bows. Must try. And I see from your bio that you're a kitty mama. Instant follow :) haha! Have a wonderful Christmas!
This is literally amazing!!! I so wish I had seen this earlier today... before I wrapped all my presents :( I am definitely bookmarking this for later, though!
Post a Comment