hi y’all! this past week, i fashioned some “vintage” american flag shorts for the upcoming NASCAR race this weekend, and was so proud of myself last night when they turned out
exactly like i wanted! i wish i had taken pictures at every step, but i'll try my best to give you an accurate description:
1 | gather your inspiration, this will help guide you when painting, how short you want to cut your shorts, and what to do on the back pockets (if anything).
 all images above were from pinterest, just search for “american flag shorts”
2 | find an old pair of jeans, preferably a lighter wash so they’ll really have a vintage feel, and the paint shows up well. we recently made a trip to goodwill, so all of my old jeans had been donated. i ran by buffalo exchange in plaza midwood and snagged a pair of $7 hollister jeans. (which was ALL i spent on this project because i had the paint on hand already!) these were brand new jeans – tags still on ‘em! the jeans had no marks or distressing on them at all, but i'm sure, if your jeans were already worn out, you could just paint and wash and scratch the distressing steps below, if you want!
3 | don’t get your scissors out yet, just get to painting! i sketched my lines with a pencil and ruler. i also printed a star on some cardstock, cut it out, and used it as a template. just trace the star with a pen and fill it in with white paint! i
didn’t use fabric paint. in all honesty, i probably won’t wear these shorts after this weekend, but i'm sure the color would wash out more if you wash it with detergent more than once. i used craft acrylic paint that i use on everything - it’s what i had on hand, and i wasn’t going to spend much money on this in case it was a failure. I would suggest using an angled brush for your stars so it can be a fairly sharp line. i painted all my white first, starting with the stripes. by the time i was through with the stars, the stripes had dried and i could move on to red, then lastly, blue. you’ll want to be sure to paint farther down than you intend to cut – so you’re pattern will go all the way to the bottom of the shorts.
4 | let the paint dry for about 5 hours, so it has time to really set in, then throw them in the washing machine -- by itself! i did a short cycle, low cold water, no detergent. then let them air dry. remember, they’re still long jeans at this point, i haven’t cut them off into shorts! once they’re dry, NOW you can cut them! i compared the length to my favorite pair of shorts to ensure that they’re an appropriate length. even though these are intended to be redneck/rockabilly, i didn’t want bootie shorts.
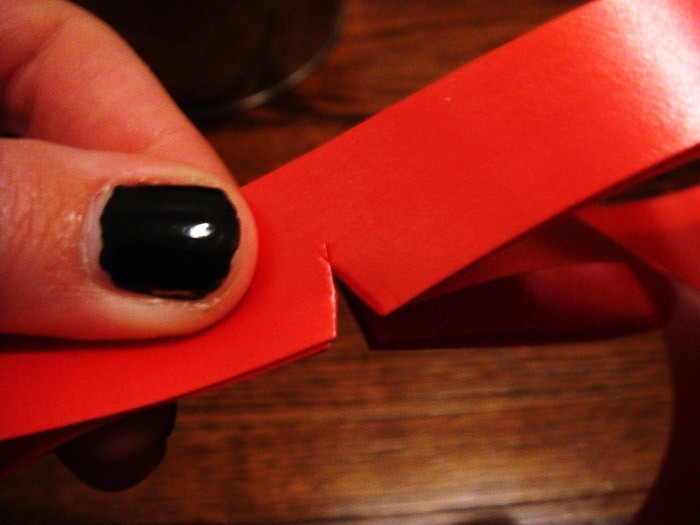
5 | using sharp scissors, get to cutting. i used my kitchen shears because they’re the sharpest i had! i used these links as a guide for distressing:
1 and
2 – 2 has a good tutorial for ombré denim if you’re interested. once you’re through cutting/distressing/destroying, throw the shorts in the wash. again, we’re doing short cycle, low cold water, no detergent. once it’s through, dry them in the dryer.
chances are, you’ll have random threads hanging all off the bottom of the shorts, trim ‘em up a bit, if you like, and you’re DONE! enjoy!

p.s. if too much of the paint washes out, simply reapply, let it dry and wash again if necessary (this was my rationale when taking a chance and washing them twice!)
where would you wear your american flag shorts?
like it?


") i know andrew thought i was certifiably crazy when he came home thursday to see this lovely swan portrait hanging in our entryway. no girl nowadays can resist a good gold frame, and i wasn’t going to let this beauty at the salvation army go to waste. i spent some time this weekend saying goodbye to the swans and jumping on the chalkboard bandwagon. the finished frame is back in the entryway, now decorated for fall! after pictures to come!
i know andrew thought i was certifiably crazy when he came home thursday to see this lovely swan portrait hanging in our entryway. no girl nowadays can resist a good gold frame, and i wasn’t going to let this beauty at the salvation army go to waste. i spent some time this weekend saying goodbye to the swans and jumping on the chalkboard bandwagon. the finished frame is back in the entryway, now decorated for fall! after pictures to come! saturday morning we grabbed some iced chai lattes and headed down the road to charming gastonia. the backstory: i've had my heart set on a round pedestal table for our dining room for some time now – spending too many hours on craigslist for the cause. i like to think that i'm pretty frugal when it comes to spending, so i've been holding out for the best deal possible on this table [under $100]. after passing up a pretty perfect antique table for $140, we took a chance and stopped at a hole in the wall “discount alley” on the way out of town. after being directed to the basement [no joke] for the furniture selection, i spotted it. andrew and i both couldn’t believe he only wanted $40 for the table. i honestly could have passed out, my hands were shaking i was so excited! we walked out of there with a new table and $30 lighter. yes, even at $40, i still negotiated!
 this is the before shot – before any sanding or staning. i've got 2 coats of poly to go before it’s finished, and i'm so excited to show you the final product!
  new birthday boots! y'all might remember my
  playing dress up in the cliché birthday sombrero at cantina 1511 on friday night.
  too much mexican food = pj party with anni-mal after din.
 me,
me,  cute little coordinated family at mellow mushroom saturday night! [only ate 1 dinner at home last week, oops]
 lastly, our weekend project. and by “our” i mean, the men. my dad and andrew spent saturday [and most of sunday] routing the gas line and installing new gas logs! we broke them in last night during the finale for breaking bad [which was ahhmazing]. our living room is quickly becoming my favorite place in the house!


 lastly, “fluff” your bow by pulling each loop, one at a time, towards the center knot with ribbon 1. i find that it works best if you start from the inside of each loop, separating each layer, and just working it until it looks the way you like!